This guide explains how to create a new email account in cPanel using your domain name. Email accounts allow you to send and receive messages using a professional email address such as info@yourdomain.com.
Steps
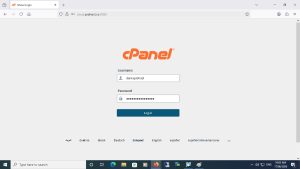
Step 1: Log in to cPanel
Log in to your cPanel account.
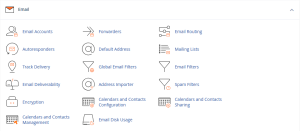
Step 2: Open Email Accounts
From the Email section, click on Email Accounts.
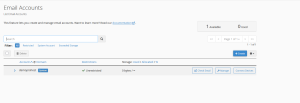
Step 3: Click Create
Click the Create button to add a new email account.
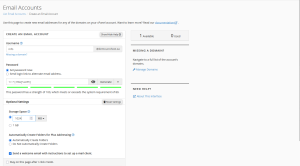
Step 4: Enter Email Account Details
Fill in the required information:
Email Username
Domain Name
Password
Storage Space
You can either enter your own password or use the Generate button to automatically create a strong password.
If mailbox storage options are available, select the storage quota that best fits your needs.
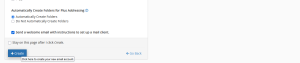
Step 5: Create the Email Account
Review the information you entered, then click Create.
Result
Your email account has been created successfully and is now ready to send and receive emails.
Next Step
You can now access your mailbox through Webmail and start using your new email account.
نظرة عامة
يوضح هذا الدليل كيفية إنشاء حساب بريد إلكتروني جديد داخل cPanel باستخدام اسم النطاق الخاص بك. يتيح لك البريد الإلكتروني الاحترافي إرسال واستقبال الرسائل باستخدام عنوان بريد مرتبط بدومينك مثل info@yourdomain.com.
الخطوات
الخطوة 1: تسجيل الدخول إلى cPanel
قم بتسجيل الدخول إلى حساب cPanel الخاص بك.
الخطوة 2: فتح Email Accounts
من قسم البريد الإلكتروني (Email)، اضغط على Email Accounts.
الخطوة 3: الضغط على Create
اضغط على زر Create لإنشاء حساب بريد إلكتروني جديد.
الخطوة 4: إدخال بيانات البريد الإلكتروني
قم بإدخال البيانات المطلوبة:
اسم البريد الإلكتروني
اسم النطاق
كلمة المرور
مساحة التخزين
يمكنك كتابة كلمة مرور بنفسك أو استخدام زر Generate لإنشاء كلمة مرور قوية تلقائيًا.
إذا كانت خيارات مساحة التخزين متاحة، يمكنك تحديد المساحة المناسبة للبريد الإلكتروني الخاص بك.
الخطوة 5: إنشاء الحساب
راجع البيانات التي قمت بإدخالها، ثم اضغط على Create.
النتيجة
تم إنشاء حساب البريد الإلكتروني بنجاح وأصبح جاهزًا لإرسال واستقبال الرسائل.
الخطوة التالية
يمكنك الآن الوصول إلى بريدك الإلكتروني من خلال Webmail والبدء في استخدام حسابك الجديد.